An integral part of managing any WordPress website is managing plugins. It’s important enough to know where to look or how to search for WordPress plugins, but you will also need to know what to do once you download them.
Locating the Plugin Interface
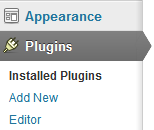
Plugin management in WordPress happens under the Plugins screen in the WordPress Dashboard. It’s only available to administrators. All other users cannot access this area of the site. It’s part of the default security. There are plugins which are available to manage roles and access secured areas. Multisite installations will find the plugins menu under the Network Admin screen.
Plugin Installation
 There are three ways to install a new plugin. Your server security as well as your personal comfort will determine which option is the right fit for you.
WordPress comes with an auto-installer. From the admin interface you can search the plugin directory from your WordPress website. This is the default method for finding and installing plugins, and it can be found by clicking on Plugins -> Add New. After finding a plugin, you can click Install, and the plugin will automatically download and install for you. This is a very popular feature for site admins.
The next method is to use the uploader. Zipped plugin files can be uploaded and installed by WordPress. You can use this feature by clicking on the Upload link in the Install Plugins page. Choose your zip file and click Install Now. WordPress does the rest.
The last option is to use File Transfer Protocol (FTP). This requires connecting your computer to the web server and uploading the files manually. This will often require knowing the address and a separate username and password to access. You will also need to unzip any files before transferring them. In most installations, the plugins folder can be found in /wp-content/plugins. Some plugins may require some extra steps so be sure to read the included “readme.txt” files for proper installation.

Managing Plugins
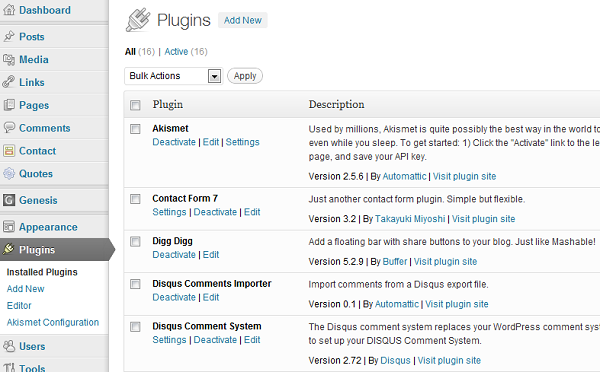
Once a plugin is installed, you can manage it under the Plugins -> Installed Plugins* screen. All of your installed plugins will be located under this screen. You will notice that some may be active or not, and there will be a series of options for each plugin. Use this screen to manage each individual plugin or bulk actions such as activate, deactivate, update, or delete. Always be sure to double-check your work before clicking submit. In most cases you can undo your actions except in the case of deleted plugins.
Understanding Plugin Statuses and Types
When reviewing your list of plugins you will notice links and filters for different plugins. Here’s a quick review of what you might see:
- Active – This plugin is running and active. The code is working in your website.
- Inactive – This plugin is installed, but it’s not running. This is like leaving your plugin in the “off” position.
- Must-Use – These plugins are loaded automatically, and the only way to remove them is to delete them from the directory. These are not like most plugins you’ll find.
- Drop-ins – These plugins can replace core functionality of WordPress. If WordPress detects these files, it uses the code that is available in them. Some examples are caching, database handling, and maintenance messages.
* As of WordPress 3.4.1.
Always Test Your Plugins
When you install a plugin, you should always ensure the site is functioning as desired. Do not install a plugin and leave it. You want to catch any issues before your site’s visitors. Some plugins could clash because of any number of issues. You may need to deactivate a plugin or delete it if it’s not playing well with your already installed plugins. Always vet your plugins personally.
Do you have any questions on WordPress plugin management?